STAGELOOP GUIDE
How to Find Seamless Loop Points for Nord Samples
A held string or pad can sound smooth until the sample loops. When the sound jumps from the loop end back to the loop start, a mismatch can produce a click, a change in level or a pulse that repeats on every pass. This guide shows how to find and refine that join in StageLoop and carry the result into Nord Sample Editor.
Download StageLoop free for macOS or Windows
1. Why a sustain loop can be hard to hide
Strings and pads can drift in tone, volume and stereo balance even after the initial attack. Two points that look similar at a wide zoom level may still sound different when joined. Look for a steady section after the attack and before the release. A useful loop repeats without drawing attention to the seam or cutting off the character of the sound.
2. How StageLoop finds loop points
In Sustain mode, StageLoop looks for stable stretches of audio and compares possible joins for waveform continuity, level and tonal similarity. It ranks the candidates so you can start with promising pairs of loop points. Use the scores to narrow the list, then choose the loop that sounds most natural for the part you play.
3. Import a WAV or AIFF sample
In the Single editor, click Open or drop a WAV or AIFF file onto StageLoop. Start with one sustained note so you can hear its attack, steady section and release. If you recorded several notes for a Nord multisample, start with one representative recording before processing the rest.
4. Use Find Loop to discover candidates
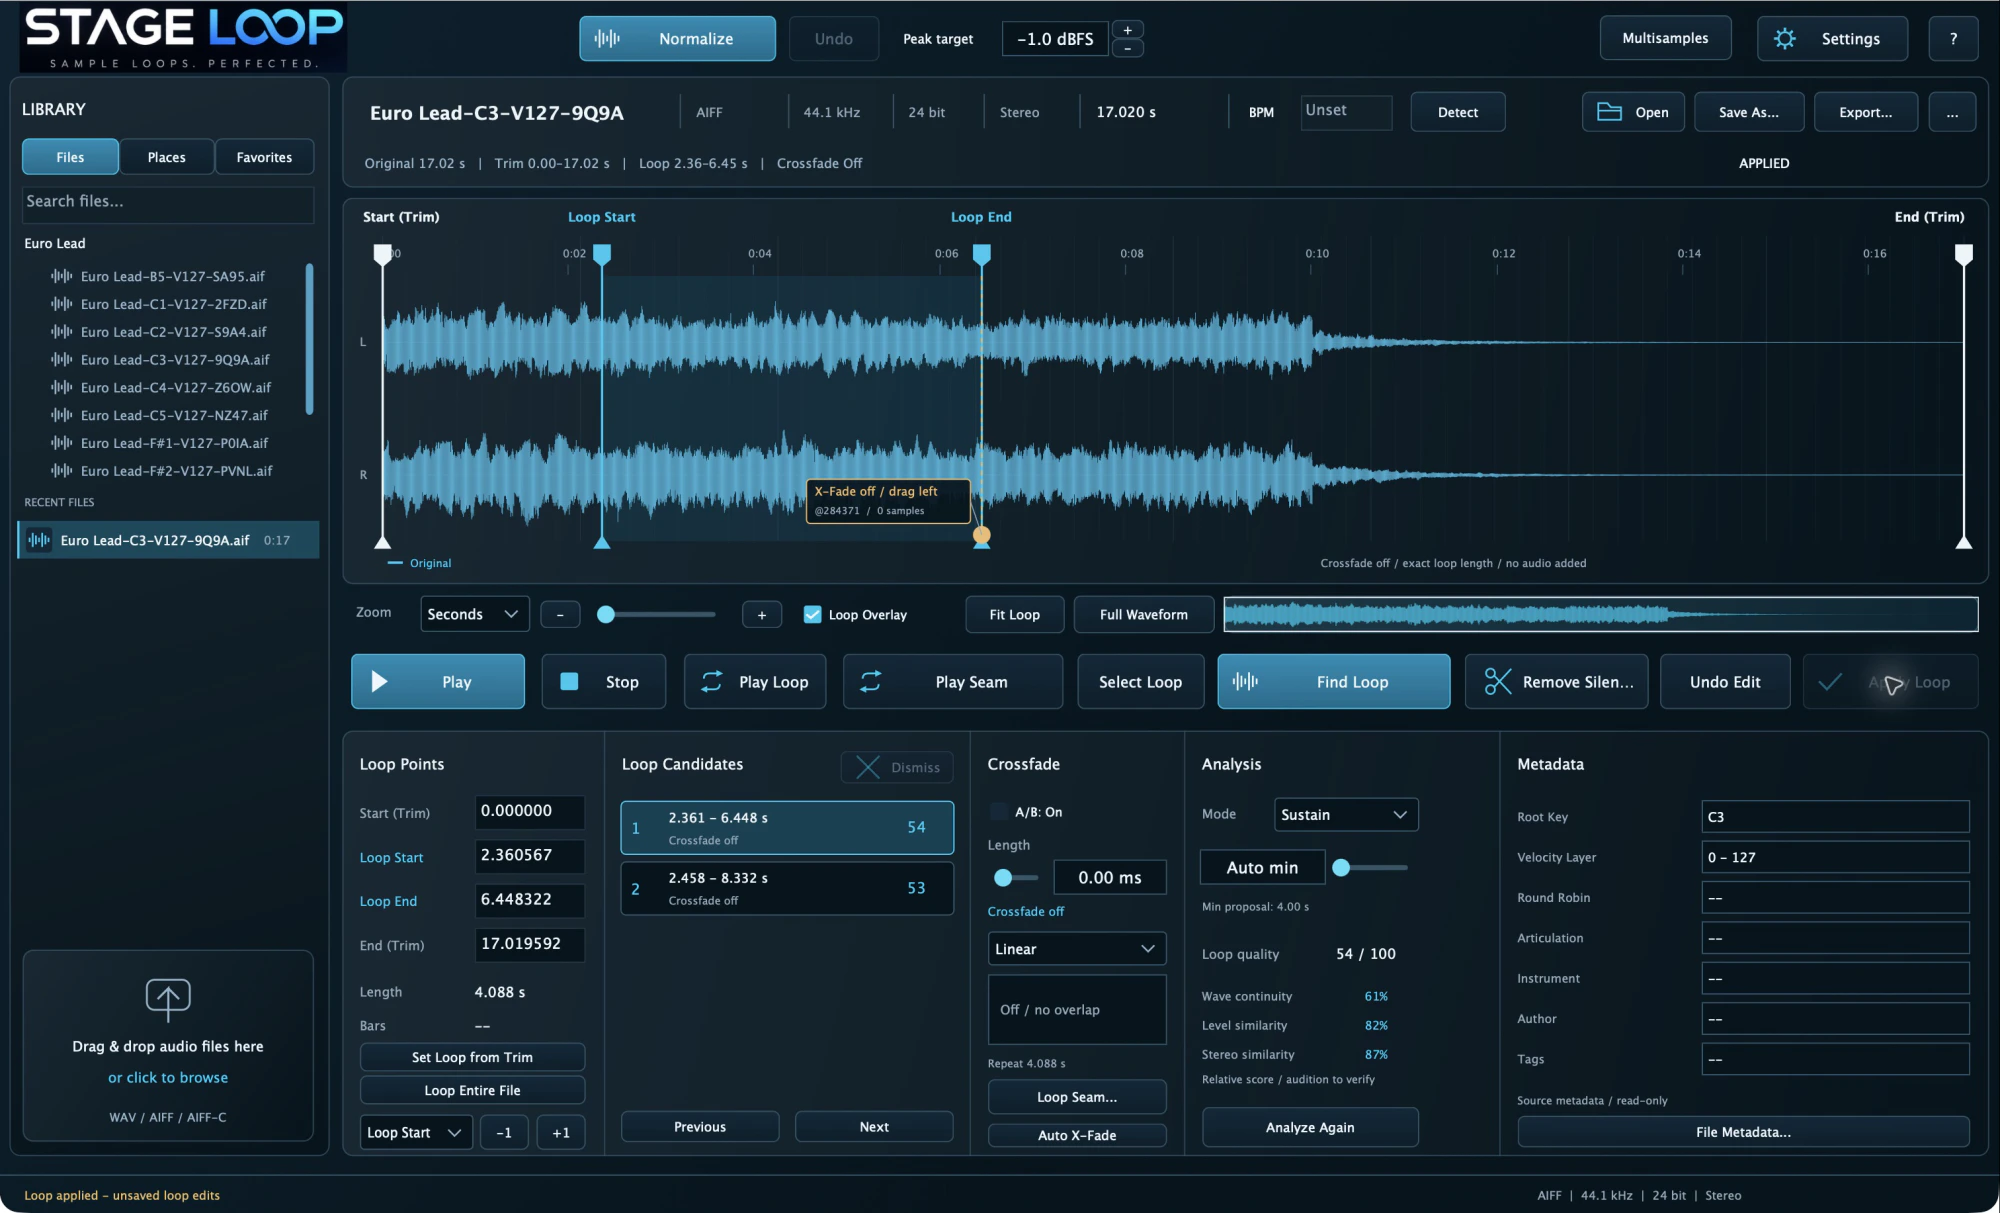
Choose Sustain for a held sound and click Find Loop. Select an entry in the Loop Candidates list to see the proposed Loop Start and Loop End in the waveform. The candidate is a preview until you click Apply Loop.
5. Compare candidates by ear
Use Play Loop to hear several repeats or Play Seam to focus on the join. Try a second candidate if you hear a click, a swell or a change in tone. A clean join can still repeat an obvious swell inside the loop, so listen to the whole region as well as the seam. Click Apply Loop when you have a good starting point.
6. Adjust Loop Start and Loop End by hand
Drag the Loop Start and Loop End markers in the waveform. Keep Loop Start after the attack so that the note can start naturally before it reaches the repeated section. Zoom in for finer adjustments and audition the seam after moving either marker.
7. Use a crossfade to smooth the transition
If the join still stands out, drag the gold X-Fade handle or adjust the length in milliseconds. StageLoop blends audio from just before Loop Start into the tail of the loop while keeping the loop duration. Start with a short fade and compare it by ear. If the fade creates a dip or a swell, try a shorter fade or move the markers to a more compatible join.
To bring a loop prepared in Single into a sample set, use Save As to write a separate WAV or AIFF and add that file to Multisamples.
8. Prepare a Nord multisample library
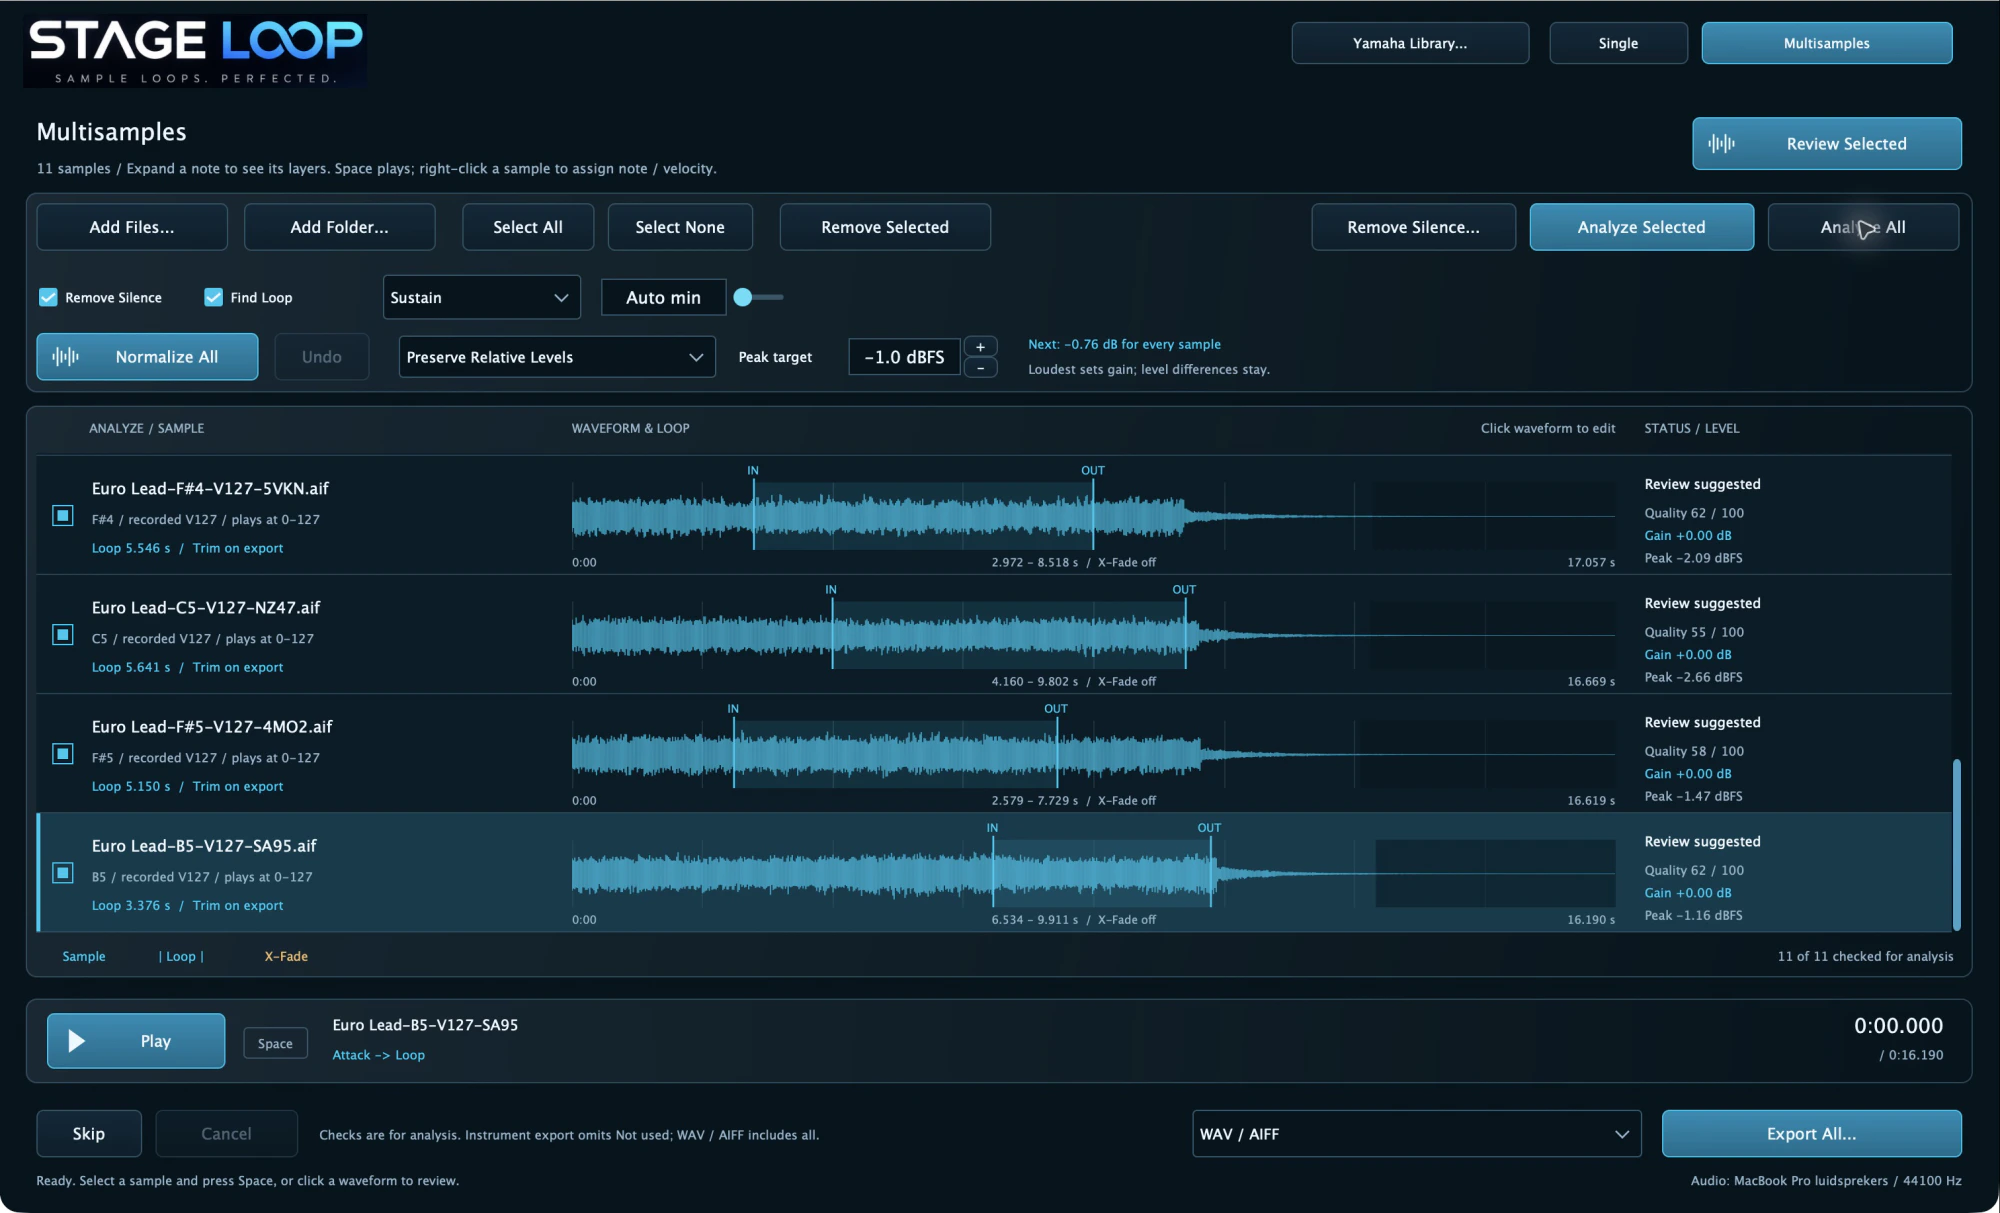
Open Multisamples and choose Add Files… or Add Folder…. For a first project, use one recording per root key. Use Analyze Selected or Analyze All to look for loops. Select a sample and use Review Selected to audition and refine it. Right-click a sample to correct its note assignment if needed. Audition several samples across the range before exporting.
9. Export a Nord Sample Editor project
Select Nord Sample Editor in the Multisamples export menu and click Export All…. Review the project and sample names, then click Continue to open Nord Export – Mapping Preview. For pitched material, use Pitched – spread zones and check each Root Key and its Key Range Low and High. Use the keyboard preview to inspect the zones. Check for unintended gaps and overlaps, and confirm Loop is enabled for the samples you want to sustain. For sounds you want on individual keys, choose the one-shot mapping mode.
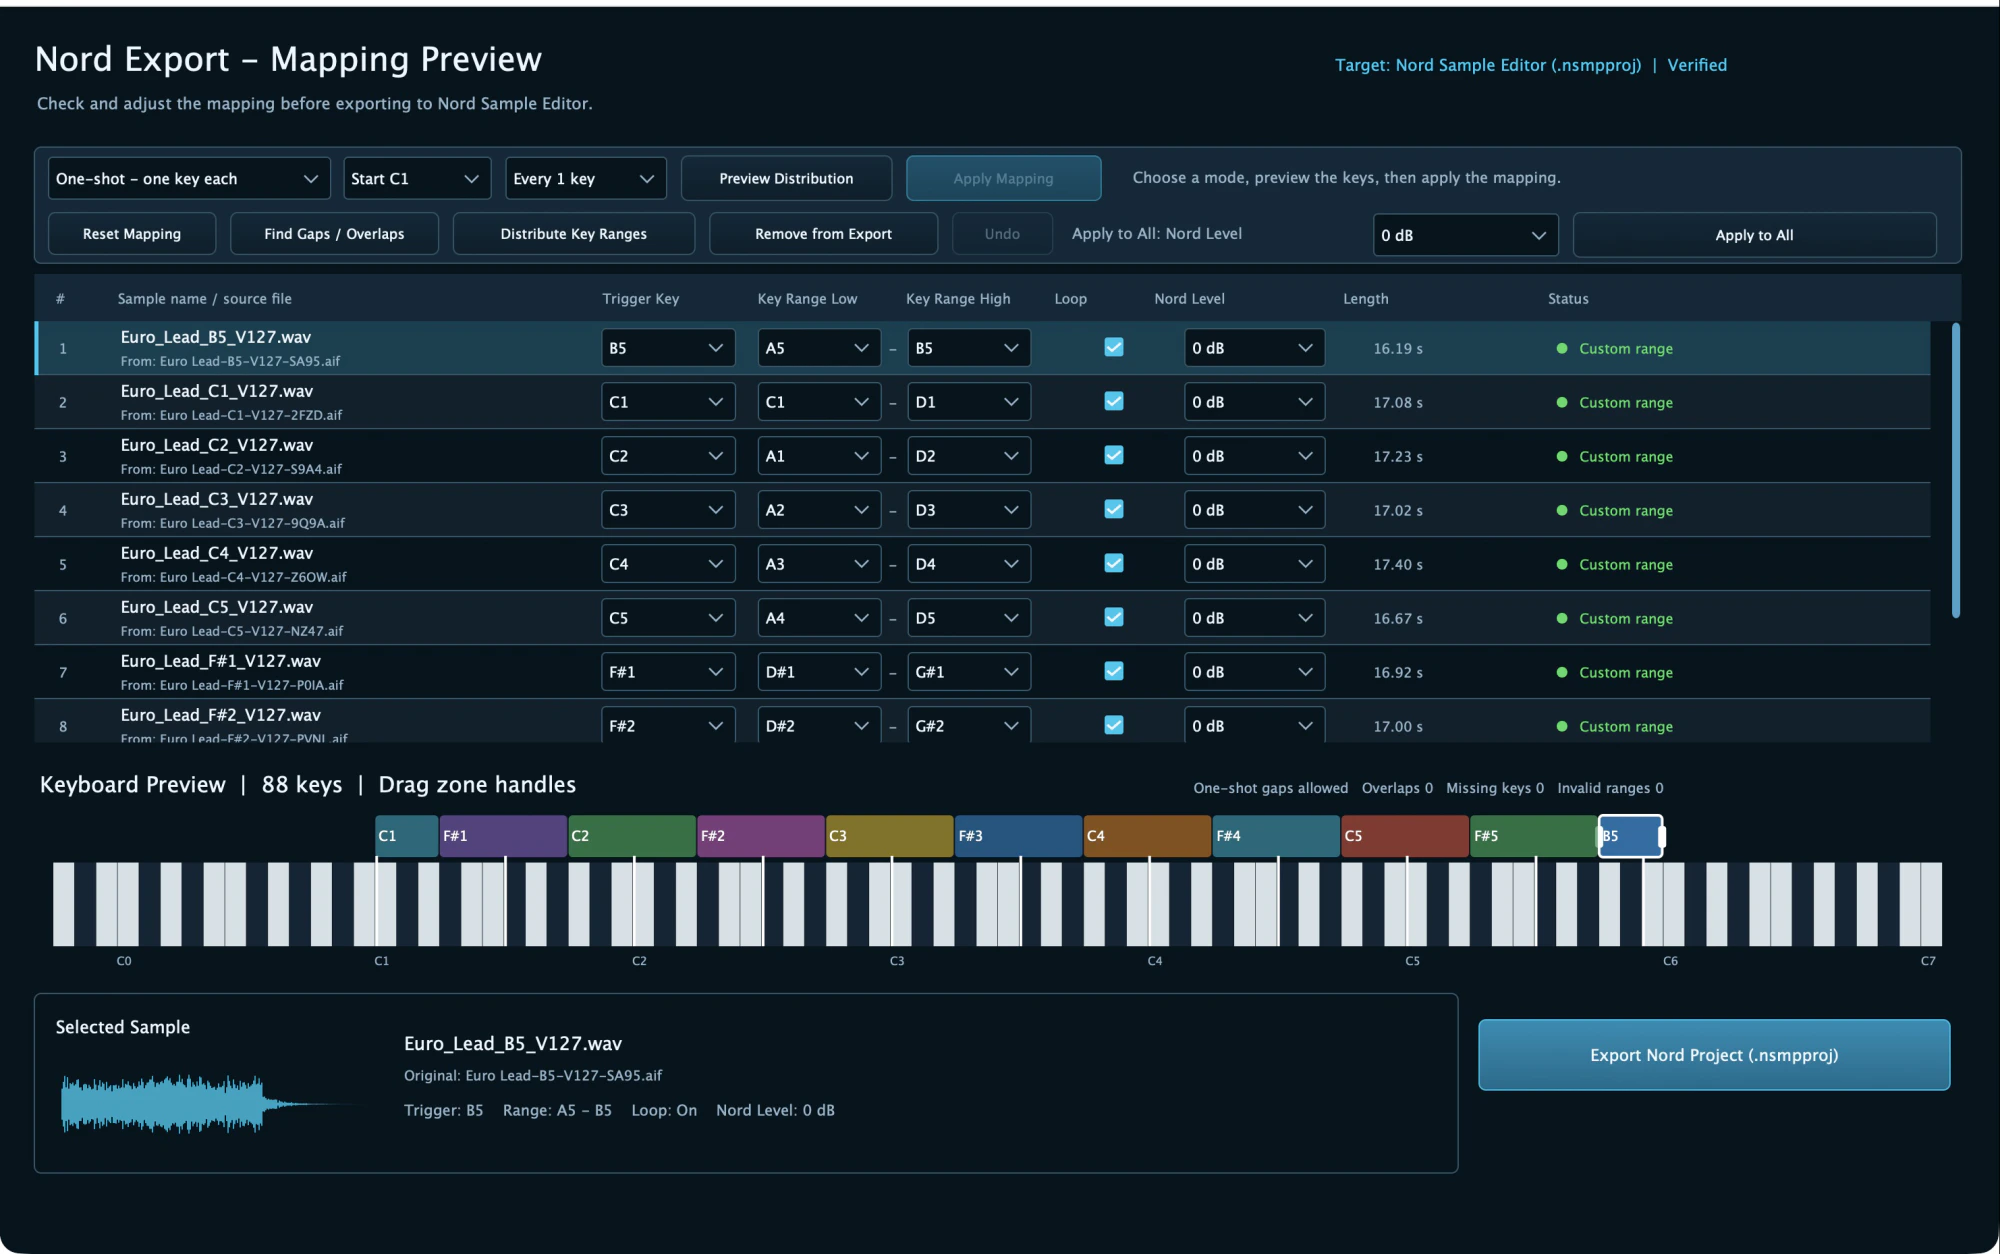
Click Export Nord Project (.nsmpproj) and choose a destination. StageLoop writes the processed WAV files to a matching _Media folder and saves the loop positions in the .nsmpproj project. Any crossfade you applied is rendered into the WAV audio. Keep the project and its media folder together when moving or copying the export.
10. Open the project in Nord Sample Editor
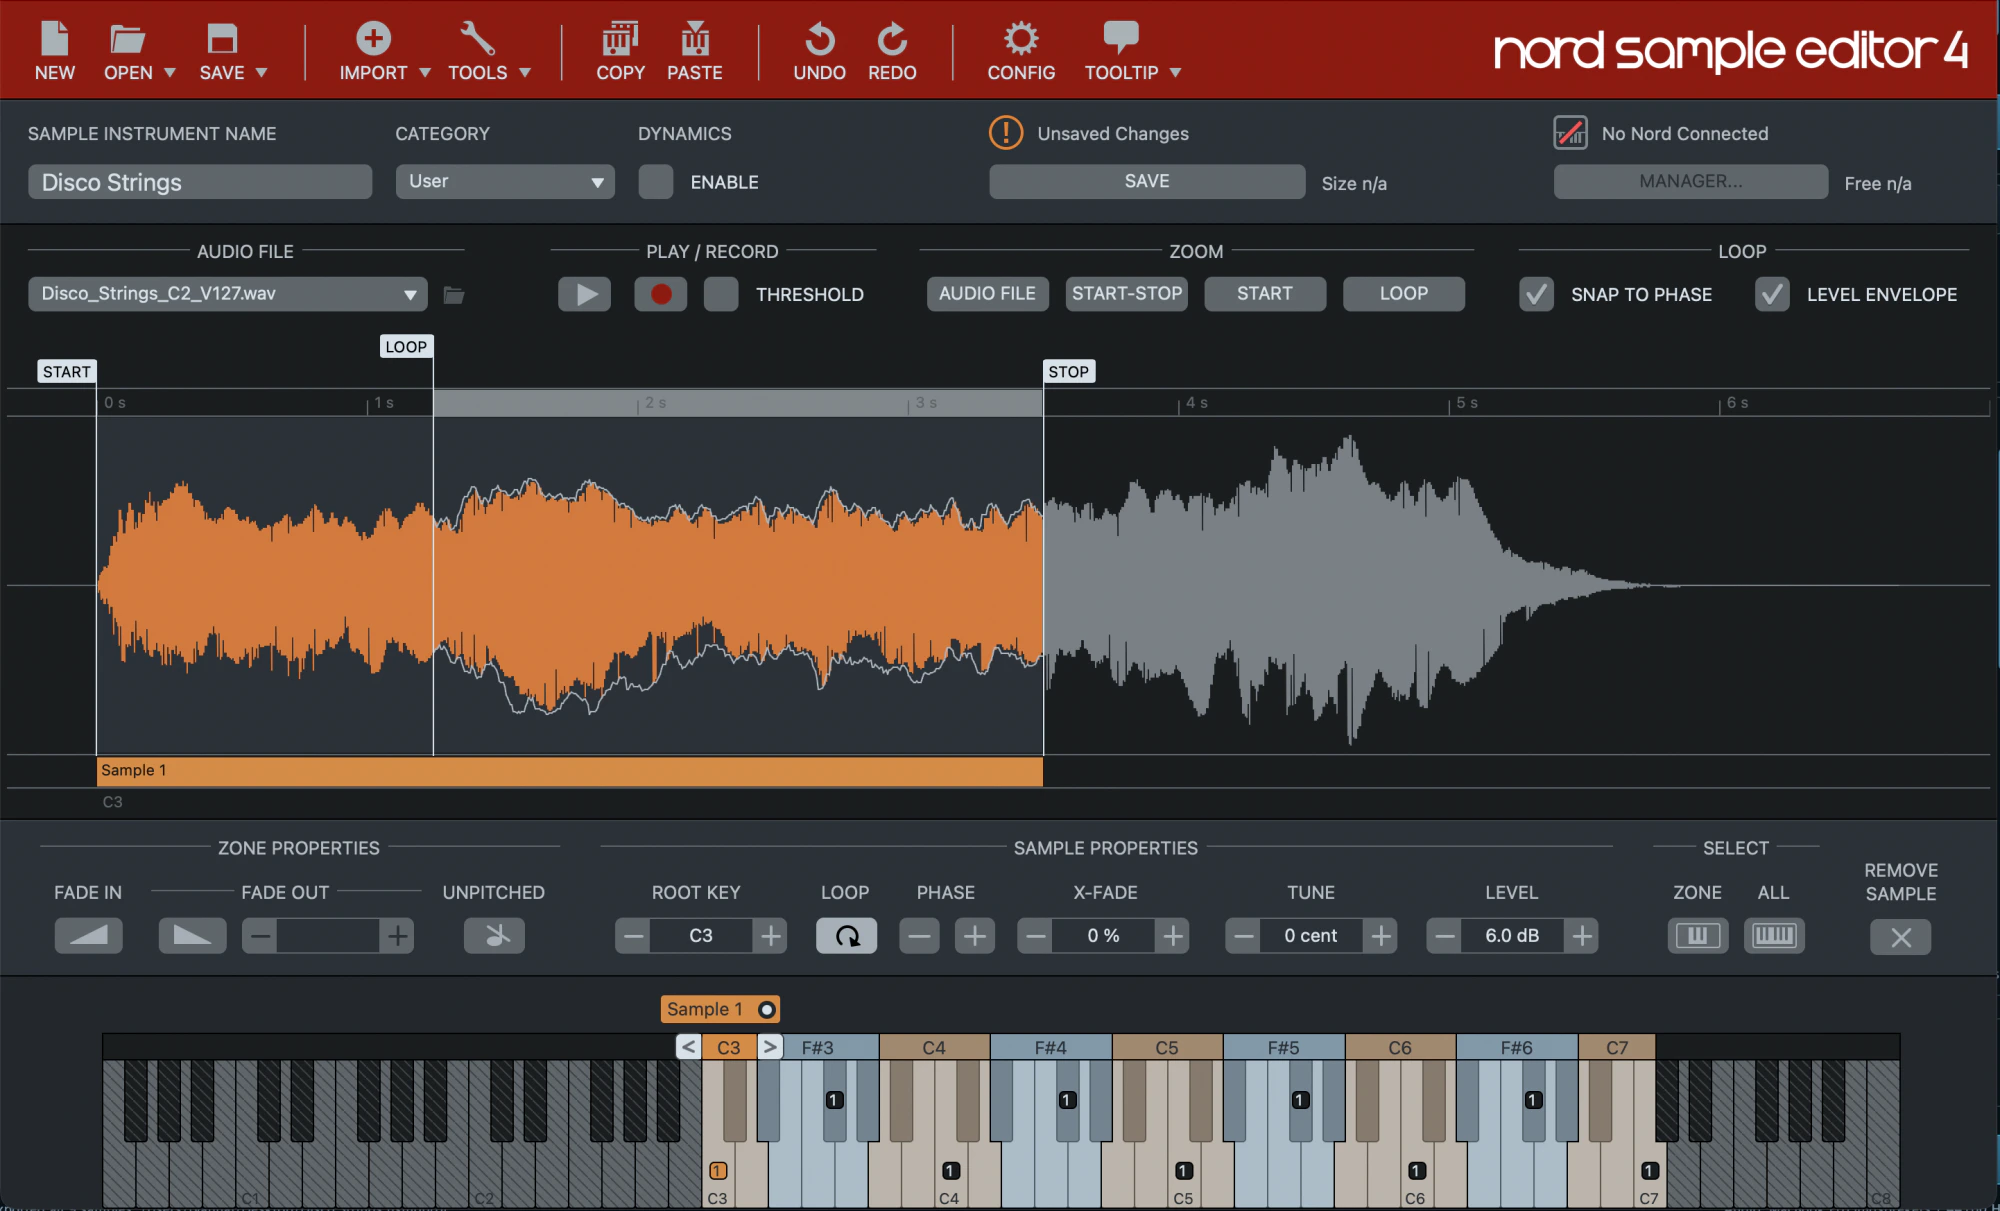
In Nord Sample Editor 4, choose Open and select the exported .nsmpproj. Select a mapped zone to see the waveform with the loop markers you set in StageLoop. Play the sample to hear it loop. The project carries over the loop points, so you can go straight to auditioning your instrument. Open the project itself to retain those loop settings. Importing the exported WAVs on their own does not restore the project’s loop markers. Then use Nord Sample Editor to create the sample instrument format for your Nord and transfer it to a compatible connected keyboard. See the official Nord Sample Editor 4 guide for model compatibility and transfer instructions.